


How to Make Christmas Confetti Soap with Melt & Pour Soap Base
If you're looking to add a festive touch to hand-washing this Christmas, you'll love our Christmas Confetti Soap tutorial. Not only do they look fantastic, they are simple to make using melt and pour soap base and the scent of Holly Berry will get you in the mood for the gift-giving season.

With Christmas just around the corner, these handmade soaps make for a perfect handmade Christmas gift, Secret Santa gift or even just a treat for yourself.
In this tutorial, we’ll be using Stephenson’s SLS free soap bases along with Zenicolors and our festive Holly Berry fragrance oil and we’ll share step by step how to make this wonderful moisturising handmade soap.
If you’re ready to jump straight in, check out our video tutorial below or keep scrolling for our written guide with full step by step instructions with images.
If this is your first time using melt and pour soap bases, we’d recommend trying out our beginner’s tutorial for making melt and pour soap first and then come back to this intermediate tutorial once you have the basics down pat.
Our tutorial is meant for personal use only. If you’d like to sell your products, please see our Melt & Pour Soap Assessments and check out our Ultimate Guide for Selling Your Handmade Bath & Body Products for more information.
Difficulty Level: Intermediate
Makes: 9 Soap Bars (roughly 150g each sliced)
Ingredients

- 900g WSLS Free Melt & Pour Base
- 400g SLS Free Melt & Pour Base
- 39g Holly Berry Fragrance Oil
- 2g Zenicolor Solo Emerald
- 2g Zenicolor Solo Passion
- Sahara Gold Biodegradable Cosmetic Glitter
- Isopropyl alcohol
Equipment

- Kitchen weighing scales
- 1 large and 2 medium heat proof jugs
- Small containers for your fragrance oil
- 2 small pots for the Zenicolors
- A sharp knife
- 3 spatulas
- Clingfilm
- Spray bottle for isopropyl alcohol

- Loaf mould (we are using a 1.2kg loaf mould)
- Mould for your embeds (needs to be able to hold 2 different embeds at 200g each)
- Grater
- Thermometer
Step 1 Measure out all of your ingredients

Weigh out 900g of white soap base, cut into small equal sized pieces and place into a large heat proof jug.
Weigh out the 400g of clear soap base, cut into small equal sized pieces and place 200g into 2 separate heat proof jugs.
Prepare and weigh out the rest of your ingredients. You may find it helpful to separate your fragrance oil into 3 containers - the first two with 6g each and the third with 27g weighed out.
Step 2 Make the Green Soap Embeds

Take one of the jugs with 200g of clear soap base. Cover with clingfilm

Melt on short bursts in the microwave or melt in a glass bowl over a saucepan of boiling water (double boiler method) until your soap base reaches approximately 65°C.
Spritz with isopropyl alcohol if bubbles form.

When the base has reached temperature, add the 2g of emerald Zenicolor. Stir until fully combined. If any bubbles form from stirring, you can spray a little isopropyl alcohol to help disperse them.

Add 6g of the holy berry fragrance oil and stir until fully combined.

Pour into a mould.
Step 3 Make the Red Soap Embed Soap

You’ll now need to repeat Step 2 above but swap out the Zenicolor Solo Emerald colorant for Zenicolor Solo Passion colorant to create the red embeds.
Once completed, pour into a second mould.
Step 4 Allow both embeds to cool

The embed soaps need to be completely cooled before we grate it. If the soap is not fully cooled it will just clump together.
Step 5 Grate the Red and Green Soap Embeds

Take your red and green soap pieces and grate them with a grater. Mix the two colours together.
If you find the grated pieces are sticking together, separate the clumps and leave then to dry out a little.

Place your grated soap into your loaf mould and space out the pieces as evenly as possible. Leave a few bits aside to be added to the top of your soap at the end.
Step 6 Melt the White Base Overpour
Now take your 900g of white soap base, cover with clingfilm. Heat on short bursts until the soap melts and has reached about 65°C. Sprit with isopropyl alcohol to help disperse and bubbles.
Step 7 Add the Fragrance Oil

Add the remaining fragrance oil to the melted base and stir to fully combine.
Step 8 Allow Overpour to Cool

Allow the soap base to cool down to under 58°C. If the overpour is too hot, the grated pieces will melt. Be sure to cover the melted soap with clingfilm to prevent a skin from forming.
Pro Tip: A spritz of isopropyl alcohol onto the melted soap base will help if a skin is starting to form on the melted base.
Once the soap base has reached about 58°C or below it is now ready to pour.
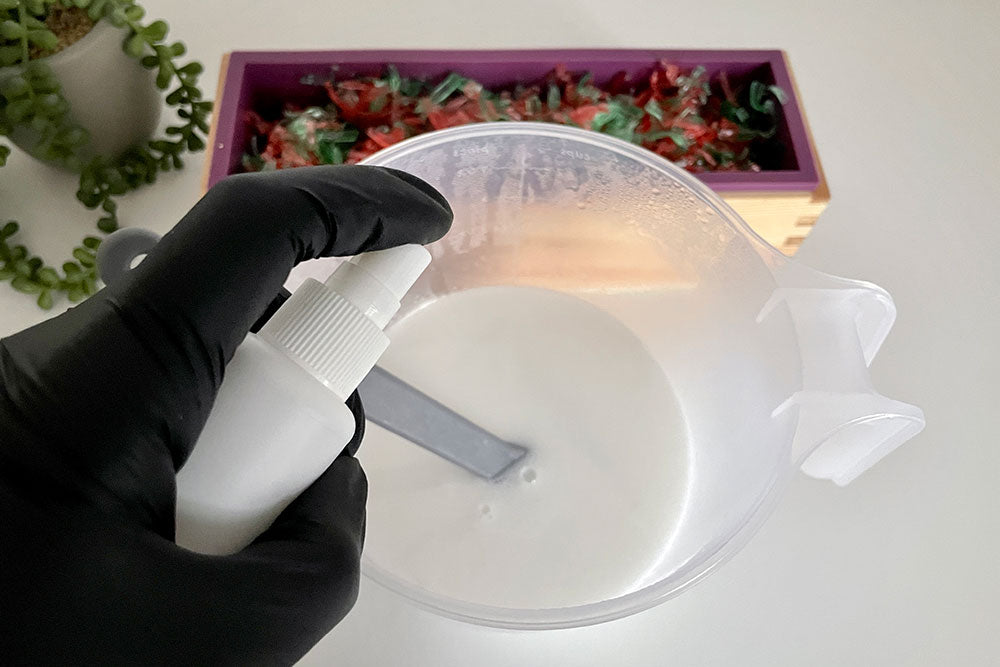
Step 8 Spray and Pour

Take your loaf mould and spray your grated soap pieces with some isopropyl alcohol. This will help the over pour run through the grated pieces more easily and help to prevent air pockets.

Now pour your melted soap base over the top of the grated pieces.
Step 9 Decorate the Top

You can now take the left over grated pieces and sprinkle them onto the top of the soap.

Spray with isopropyl alcohol to disperse any bubbles that form.

Take your gold glitter and add a little sparkle to your finished soap.

Leave to fully cool. This may take a few hours.

Once cooled your soap is ready to unmould and slice. Your soap is ready to use straight away.
What are Zenicolors?
Zenicolors are soap dyes that have been specifically formulated to colour melt and pour soap bases. This series of soap dyes are non-bleed, making them perfect for all kinds of colouring techniques and are perfect for both beginners as well as advanced makers.
Brilliant at keeping the transparency in clear soap bases as well as creating perfect pastels and solid colour in opaque bases, these melt and pour soap colourants require no premixing and have a paste like consistency. They're extremely easy to use too. The recommended usage rate is 1% - simply mix into your melted base and stir until dissolved.
Looking for other Christmas-inspired bath and beauty products to make? Check out our layered Snowflake Soap tutorial and our fizzy bubbly Cranberry Peppermint Bathbombs here.
1 comment
Will this work using individual soap molds? Thank you.