


How to Make Bath Bombs in 6 Easy Steps!
Most of us would agree that enjoying a soak in the bath after a long day is the best way to relax and unwind and adding a beautifully scented bath bomb only makes the ritual more luxurious. Creating your own bath bombs is a wonderful way to customise your scent preference and with the help of our tutorial, you'll find they are easy to make so you can experience that luxury for less.
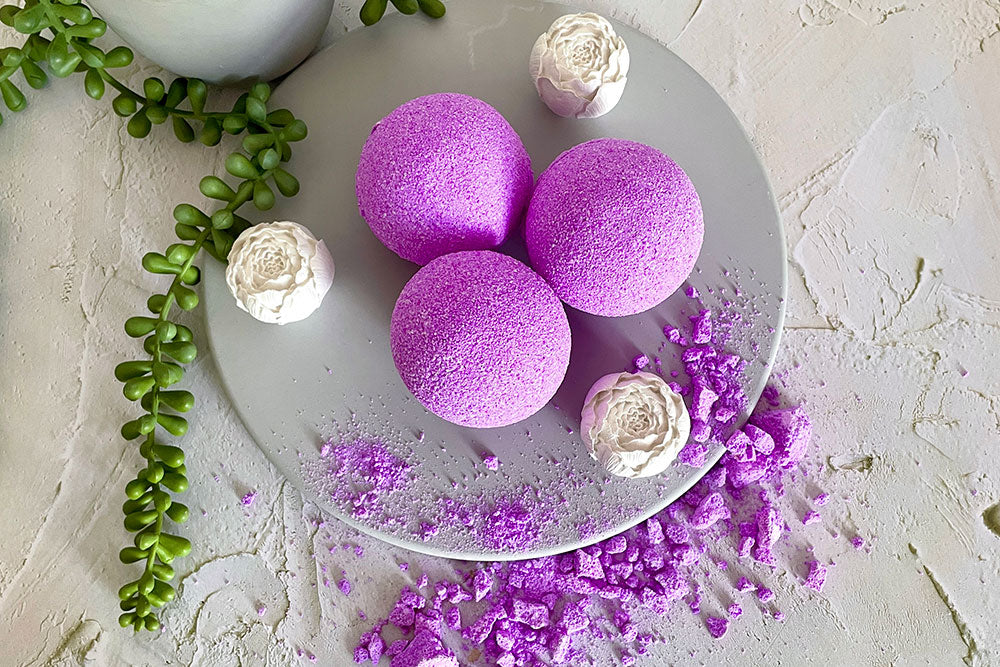
While purchasing bath bombs can be a bit costly, we're sharing a tutorial today to make your very own pear-scented bath bombs as well as giving you just a bit more helpful information to create these fun, luxurious bath staples.
Check out our video tutorial below or read on for a written version with images for each step and more information on how to customise the recipe to create your own version!
Please note: Our tutorial is designed for personal use only. You will need to follow all legal responsibilities before selling any products that come into contact with skin.
See our Bath Bomb Assessment here if you are considering selling bath bombs and be sure to check out our blog post Assessments & CSPR: How to Sell Bath & Body Products in the UK.
How to Make Pear Scented Bath Bombs

Why not try making your own bath bombs? Our tutorial will make it easy for you to get started!
Difficulty Level: Beginner
Makes: 4 bath bombs (2.5” sphere moulds)
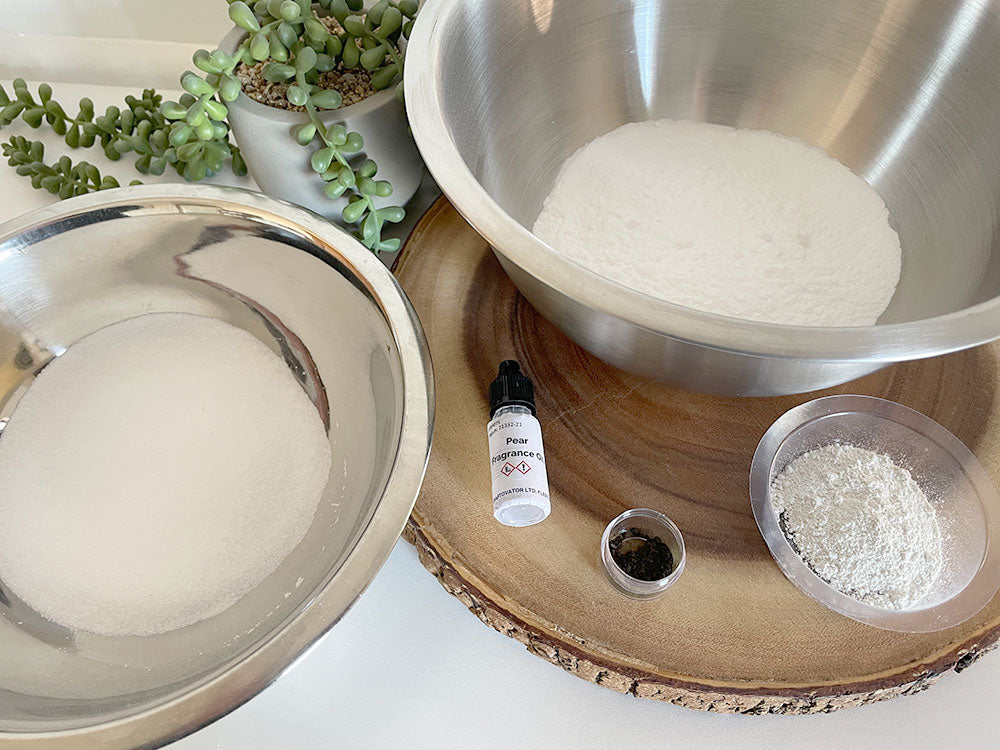
Ingredients
300g Sodium Bicarbonate
150g Citric Acid
4g Kaolin Clay
>1g Pink Water Soluble Dye of your choice (roughly what would fit on the very tip of a teaspoon)
Equipment You'll Need
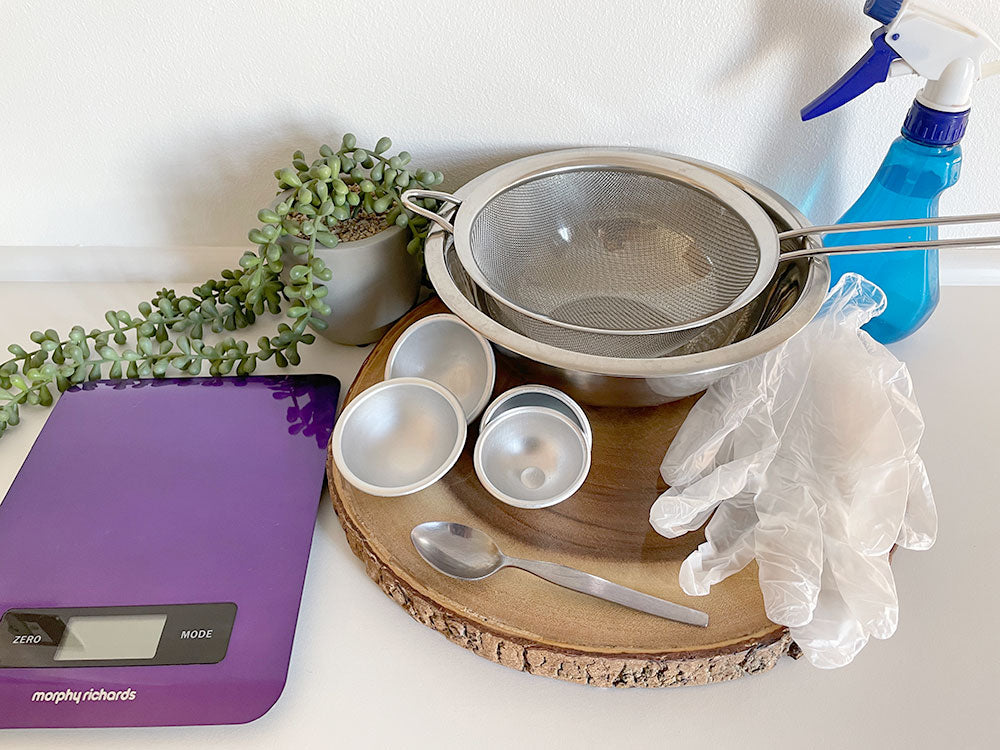
- 2 mixing bowls and 1 small bowl
- Sieve
- Weighing scales
- Spray bottle with water
- Disposable gloves
- Bath bomb moulds*
- A teaspoon may be useful
* If you do not have any metal bath bomb moulds, you can use a muffin tray, an empty yogurt/rigid plastic pot or any silicone cavity moulds.
Step 1 Weigh Out Your Ingredients
Wearing your disposable gloves and into your three separate bowls, sieve and weigh out 300g of Sodium Bicarbonate, 150g of Citric Acid into the mixing bowls and 4g of Kaolin clay into the third smaller bowl.
Set the citric acid to one side for now.
Step 2 Start Mixing Your Dry Ingredients

Add the 4g of Kaolin clay to your Sodium Bicarbonate along with a very small amount of water-soluble dye. You can use the very tip of a teaspoon or just start with a small sprinkling.
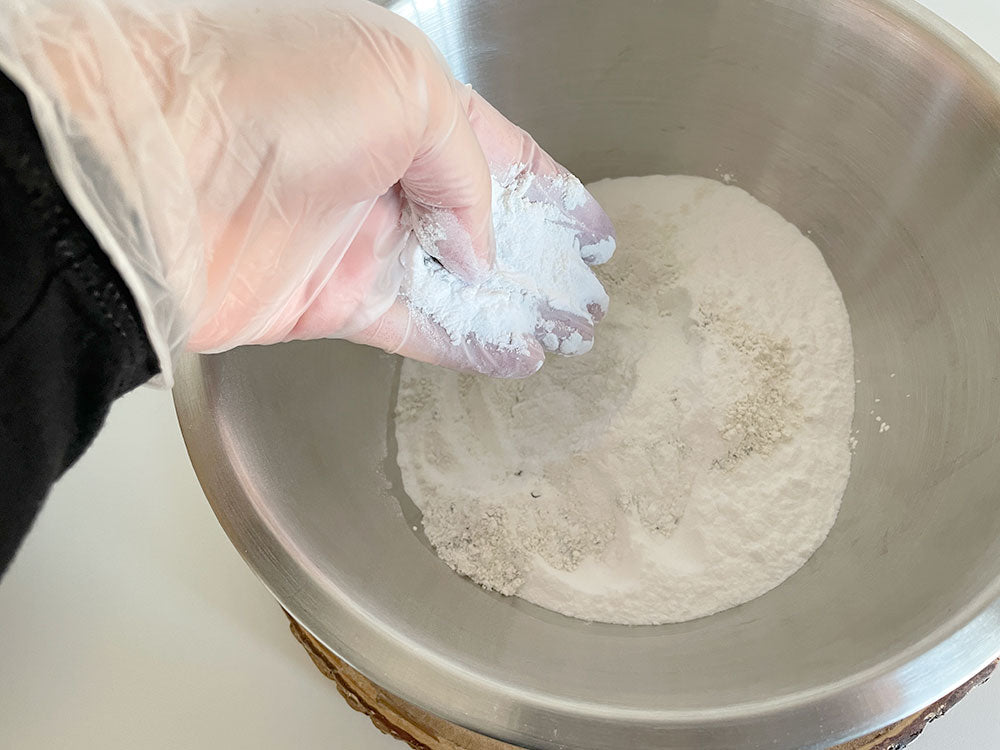
Mix these ingredients together with your hands, gently rubbing between your fingers to combine.
Step 3 Add Your Fragrance Oil
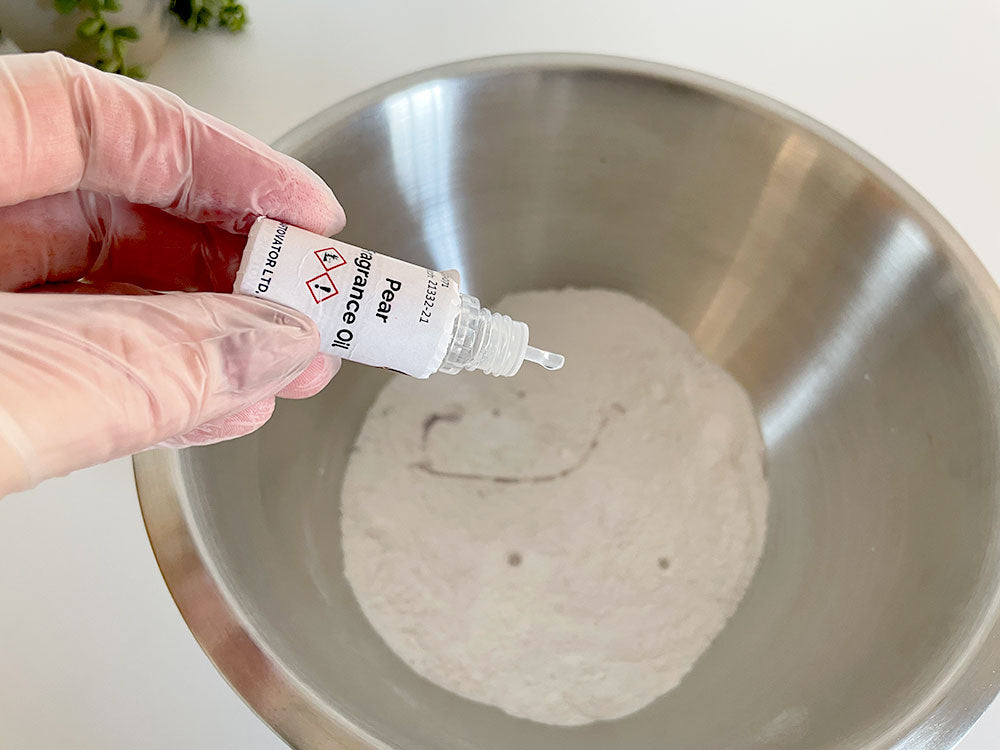
Place the bowl of your mixed ingredients on to your weighing scales. Zero out the counter and add the 9g of Pear Fragrance oil. Once again, use your hands to mix the fragrance oil into the dry ingredients.
Step 4 Add the Water
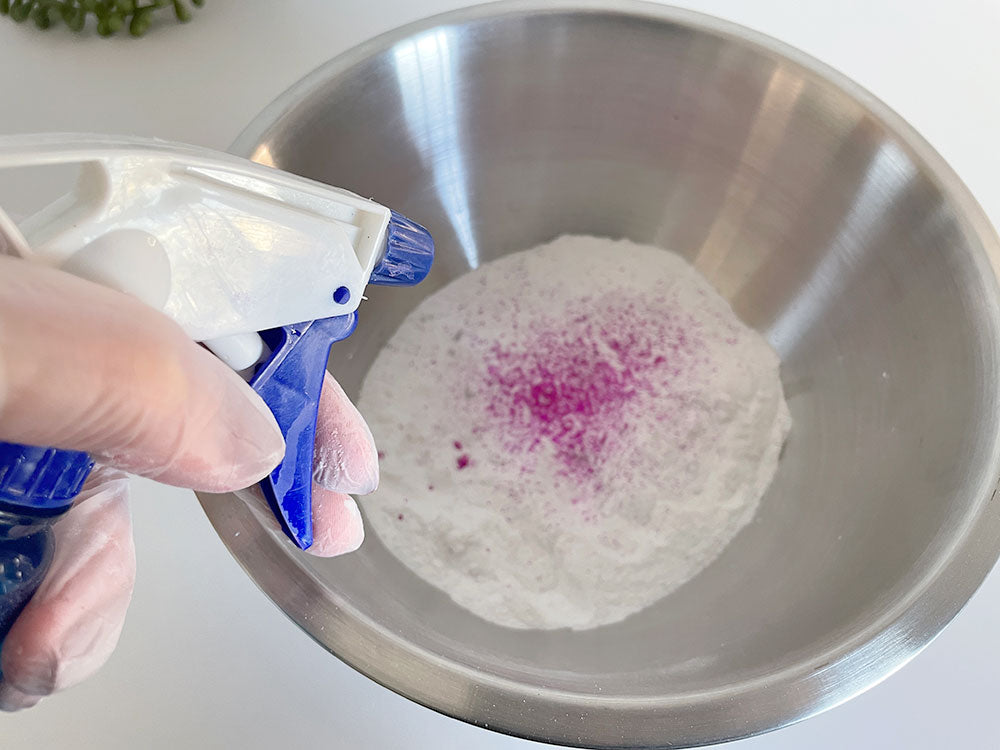
Take your water spray bottle and spay into the mixture. The number of sprays will differ depending on how much water comes out with each spray. Start with just a couple of sprays. With your hands, mix in the water into the dry ingredients.
Now, you should start to see a couple of things happening at this point. The first is the coloured dye will now be activating so you will begin to see the colour come through. The second is that the mixture will start to bind together.
As we spoke about at the beginning of this blog post, we are looking for the texture of damp sand. You will need to continue to spray the water into the mixture until it reaches this consistency.
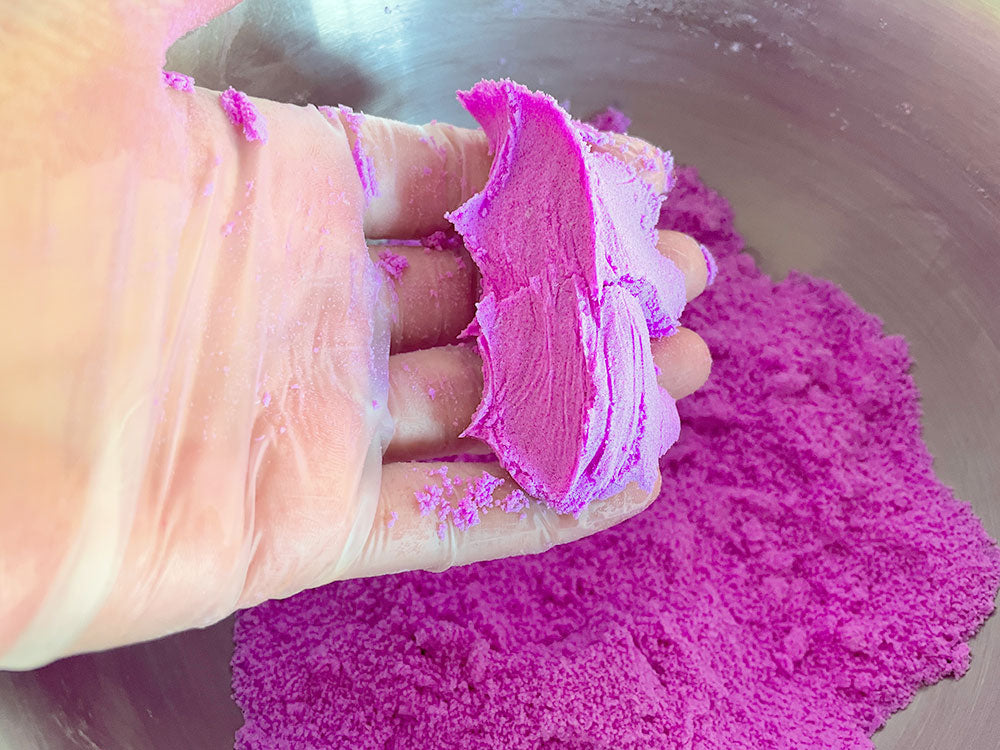
Your mixture should get to the point where you can squeeze a handful of together and it stays in a solid form when dropped back into the bowl.
Top tip: If you find the mixture is sticking to your gloves, you may have added too much water. However, if this does happen, do not panic! We have not yet added the Citric acid (the active ingredient). Just set to one side for a short time to allow the mixture to dry out a little.
Step 5 Add the Citric Acid
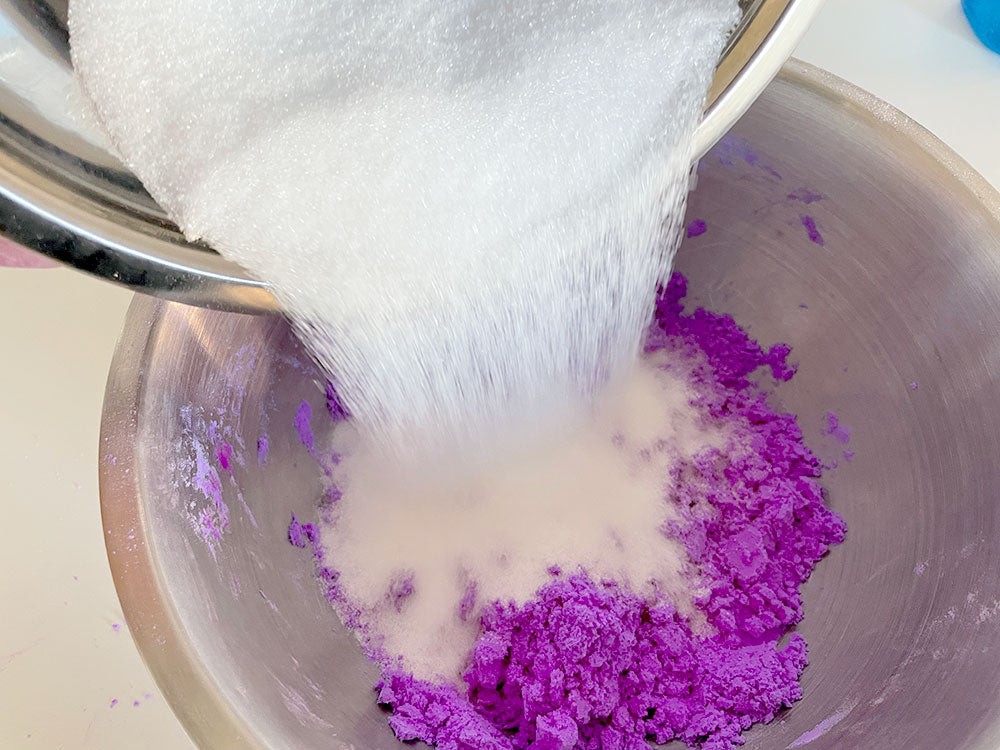
This last step is what activates the 'fizz' in your bath bomb so it's important to work quickly! Have your moulds ready and to hand. Take your bowl of citric acid and add it to your mixture.

Using your hands, thoroughly mix everything together. The mixture should still hold its form when squeezing a handful together.
Step 6 Put the Mixture into the Moulds
Take the first half of your mould and fill it with mixture. You will need to overfill the mould so that there's a mound on the top. Do the same with the other half of your mould. Overfilling both halves of the mould means you do not have to pack the mixture tightly. This can cause the mixture to stick or separate when unmoulding.
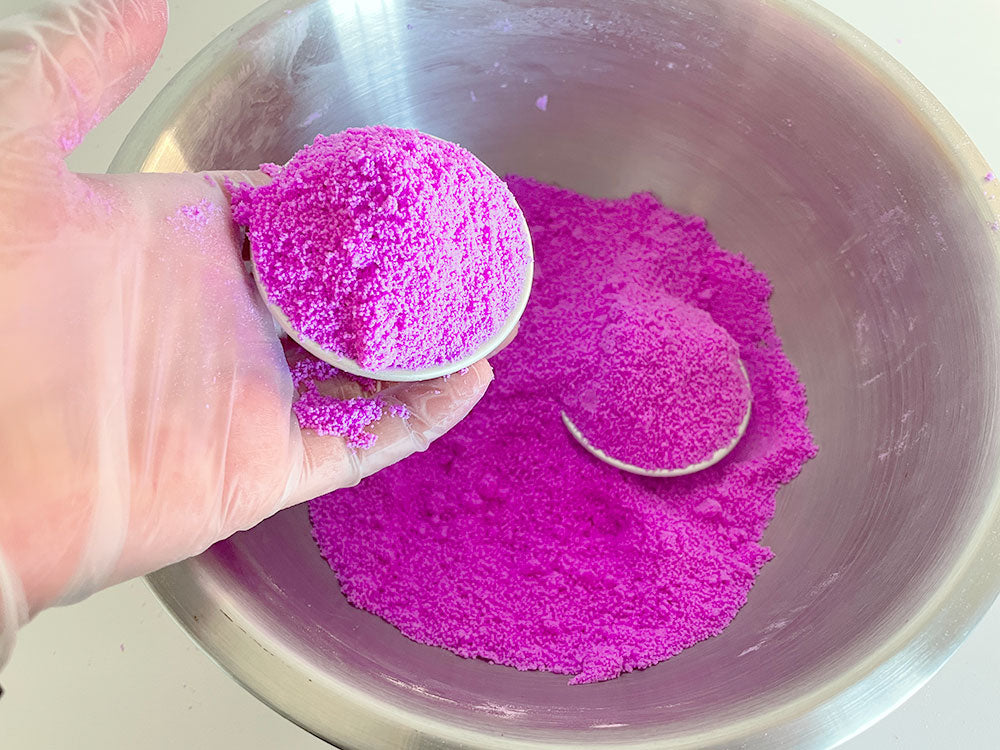
Top tip: If you're using a muffin tray, yogurt/rigid plastic pot or a silicone cavity, you will need to pack the mixture in tight. Use the back of a spoon to smooth the top.
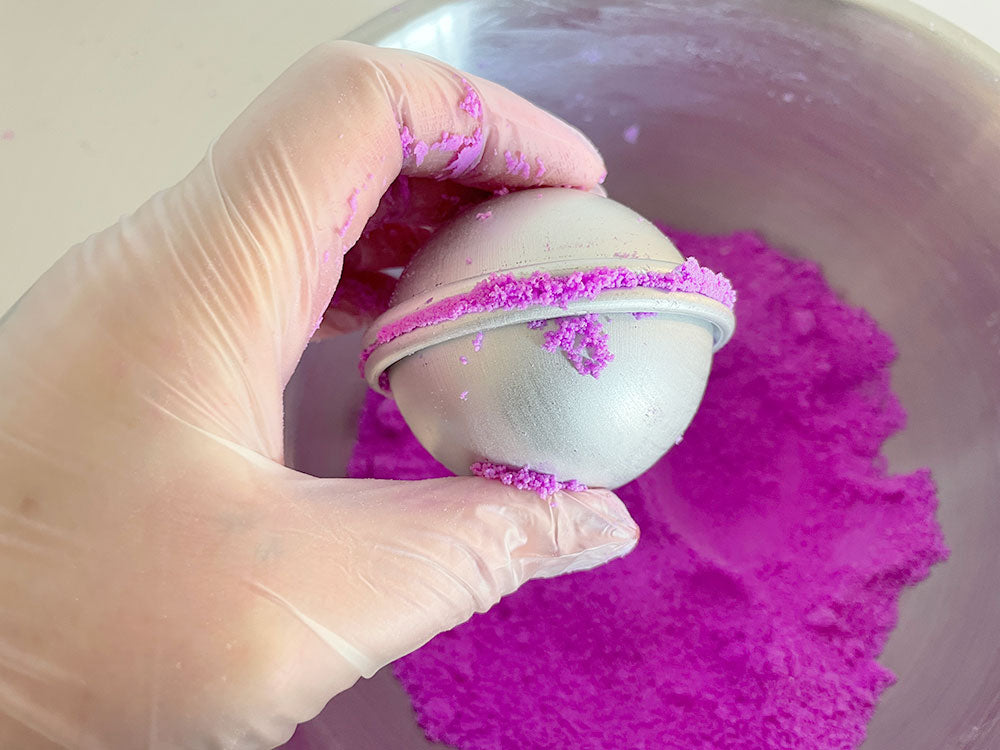
Now take both halves and put them together.
Do not twist the moulds together and try not to move the two halves once they are pushed together.
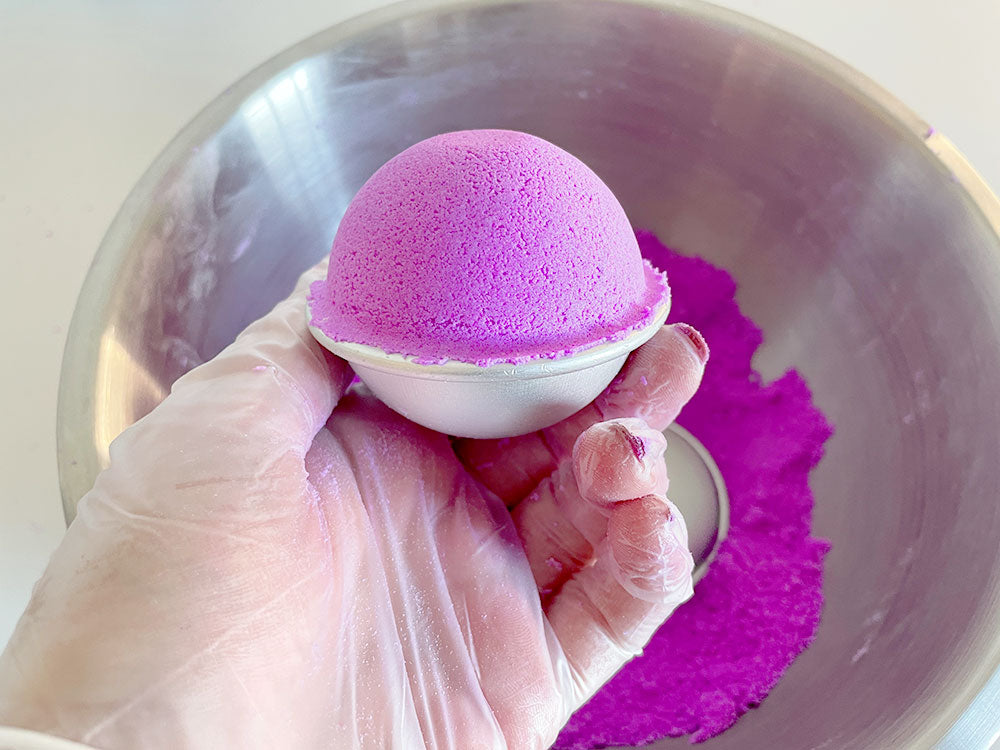
Give the moulds a light tap around the rims and release the top half of the mould. keep the bottom half on for approximately 30-60 minutes to allow the bomb to dry out a little.
Top tip: If you find that the bottom half of the mould is stuck on after leaving it for that brief time, try tapping it with the back of a spoon as this may help it release.

Allow up to 24 hours for the bath bombs to fully dry out before using them.
Why Consistency is Key to Making Bath Bombs
Of course, it's quite natural to want to jump in and add lots of additional ingredients but knowing the basics is a must. Until you have learnt about the feel and consistency of a basic bath bomb mix, there are many things that can go wrong. Achieving the right consistency is the key to making bath bombs.
You will need the mixture to be the consistency of damp sand, the kind that makes a perfect sandcastle! Too wet and it will stick in the bucket and fall apart, too dry and it will just crumble away!
The Three Ingredients You Need to Make a Basic Bath Bomb
A bath bomb can be made with just 3 simple ingredients. Sodium bicarbonate (also known as bicarbonate of soda), Citric acid and water to bind the dry ingredients. When a mix of sodium bicarbonate and citric acid come into contact with a lot of water, it produces carbon dioxide bubbles - it's this reaction that produces all the bubbles and fizz we love about bath bombs!
We'd recommend adding one more ingredient to the mix, Kaolin Clay. This is a great additive to start with as it not only acts as a filler (to help slow down the initial fizz and makes the bomb last a little longer) but it also helps to harden the bath bomb and softens the water making it feel silky on the skin.
What Colours Can I Use in Bath Bombs?
While you don't have to use colour if you choose not to, for our tutorial we've chosen a water-soluble dye. Using these dyes are a great way to add some colour to both your bombs and your bath water but you don't need to worry about them staining your skin.
The water-soluble dye comes in powder form and is very concentrated which means only the tiniest amount is needed. In fact, the amount we used for our tutorial didn't even register on the scales!
How Much Fragrance Should I Use for Bath Bombs?
Adding fragrance to your bath bombs is another great way to customise your creations. You are able to scent your bath bombs with up to 3% of either a fragrance oil or essential oil. What does this mean? When considering the total weight of your finished product, you want to ensure that no more than 3% of that total weight is made up of your fragrance oils.
For instance, in a bath bomb mould that holds 50g of finished product, 3% of the total weight would be 1.5g of fragrance oil (50g x 0.03 = 1.5g). You always want to measure your fragrance oils in weight, not by millilitres. Why? Because millilitres is a volume measurement and not a weight measurement. Oils will often vary in their viscosity (meaning some will be lighter and some heavier) so even at the same volume, you will find they will be different weights. To account for this and to make it easier, every ingredient in your bath bomb should use the same unit of measure - in this case, grams.
Can I Use Any Fragrance Oil in My Bath Bombs?
The most important thing is to check whether the oil you would like to use is skin safe. You can do this by checking the IFRA 49 th Amendment document which is available for download on the fragrance product pages. Bath bombs come under category 9 so if the IFRA documents for category 9 states the safe usage as being 3% or higher, then you can use up to the full 3%. Just to be clear though that if the IFRA gives a percentage of more than 3% it is advised to still only use no more than 3%.
In Bath bombs you will find that 2% will be sufficient. In our tutorial, we've used 2% of Pear fragrance oil but feel free to add any fragrance that's skin safe.
Some last tips for making bath bombs...
Like anything, practice makes perfect so don't be discouraged if your bath bombs aren't perfect your first try! Here are a few more trouble shooting tips!
Work in small batches
The consistency of any bath bomb mixture is the key to success. Getting this right and learning what to look and feel for may take a few attempts, therefore working in small batches is especially important. Smaller batches will give you more time control and you won't end up with a lot of wastage like you would from learning with larger batches.
My bath bombs are expanding!
If you find that your bath bombs are activating before they are set and dry (they can go “warty” and expand!), this is because too much water has been added to the mixture.
My bath bombs are crumbling!
If you find that your bath bombs are crumbly, powdery and/or break up when removing from the mould or when handled, this may be because either the mixture was too dry or because there was not enough mixture in the mould to be able to bind together properly.
The good news? You can still use any mishaps, they will work perfectly fine!
Ready to give bath bombs a try? Check out our range of fresh fragrance oils to create your very own spa experience at home or check out our full range of bath and body products here!
8 Comments
Hi Lauren, For BB dust it is the same recipe, just leave out the part where you put it into moulds. We’d recommend laying the mixture on a tray to dry and every so often, crumble it up with your fingers to make sure it doesn’t dry in one lump! And yes, you can add mica for shimmer, no problem :) Hope that helps! Kimberly – Craftovator
I’d really like to make bath dust, is it the same recipe as bath bombs but without the moulding into bomb shape part? Ot is the process different? Can I use mica as well to add shimmer?
Hi Evie,
The full recipe makes 464g of product and will make approximately 4 bath bombs at around 2.5" diameter. So your bath bombs will weigh roughly 100g-115g each depending on how tightly they’re packed – plus you’ll always lose a little bit whilst you’re making them! But hopefully, that helps!
Kimberly – Craftovator
How much does 1 bombs weigh ?
Hi Lauren, For BB dust it is the same recipe, just leave out the part where you put it into moulds. We’d recommend laying the mixture on a tray to dry and every so often, crumble it up with your fingers to make sure it doesn’t dry in one lump! And yes, you can add mica for shimmer, no problem :) Hope that helps! Kimberly – Craftovator