


How to Make Scoopable Wax Melts (these smell AMAZING!)
Yes, we’re talking about wax that’s scooped out of a jar! It may sound strange but scoopable wax smells just as amazing as other forms of wax melts and is incredibly easy to use too - simply scoop out a little using a spoon and add to your burner. Easy to store, easy to make for small businesses and simple for you or your customer to customise the amount you use, it’s no wonder scoopable wax is becoming such a popular option for wax melt lovers!
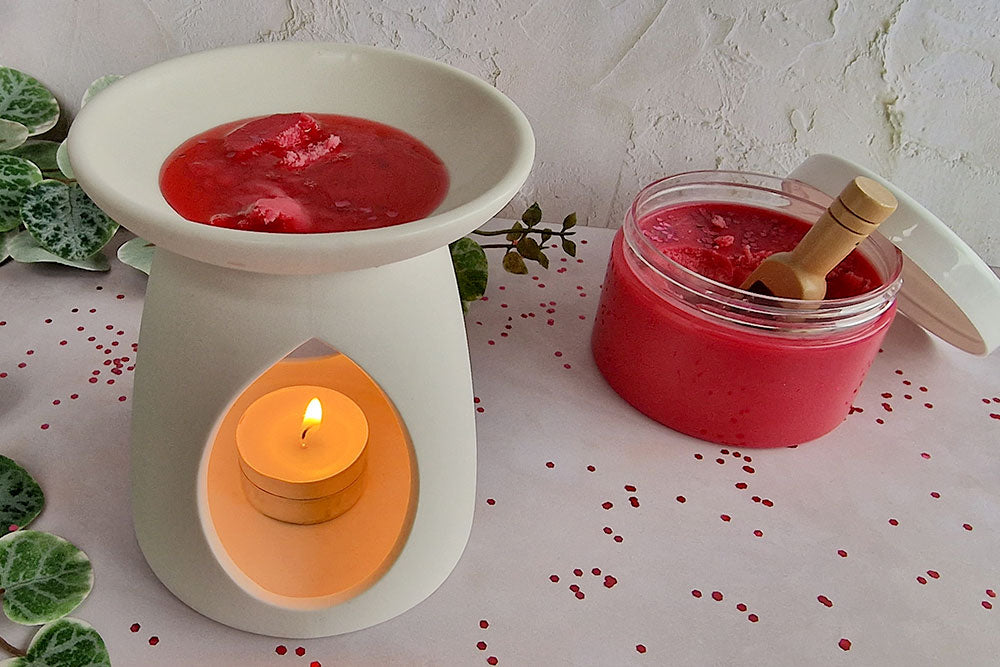
In our tutorial we’ve used Mulberry fragrance oil for its warming yet enticingly fruity fragrance along with scarlet liquid dye, fiery fusion mica powder and a little sprinkling of red glitter to complete the look. Mulberry is perfect for the Winter months but also great to use all year around if you like fruity scents.
The addition of coconut oil has been used to soften the wax, allowing it to be easily scooped from the jar and in testing, found a 30% coconut oil to 70% EcoSoya CB-Advanced ratio to work well. If you use a different kind of wax melt wax, you may need to play with the ratios a little to find what consistency works best for you.
If you’re new to making wax melts, then our beginners guide on How to Make Wax Melts should be your first stop as the post will guide you through the process and options available. Once you’ve mastered making simple wax melts in either moulds or clamshells and feel comfortable with making simple melts, you can come back and attempt this more advanced tutorial.
Want to get stuck in now? Read on for your full step-by-step guide or check out our YouTube video above to get started.
Difficulty Level: Intermediate
Makes: 250g of Scoopable Wax
Ingredients Needed

- 161g EcoSoya CB-Advanced Wax
- 69g Coconut Refined Oil
- 20g Mulberry Fragrance Oil
- Scarlet Liquid Dye
- Fiery Fusion Mica Powder
- Red Extra Chunky Biodegradable Glitter
Materials Needed

- 1x Round 250ml Jar
- 1x Round White Cap
- Digital Weighing Scales
- 100ml Measuring Cup
- Milk or Digital Thermometer
- Metal Spoon
- Melting Pot
- Pan
- Kitchen roll to protect your work surface and for wiping tools
- Nitrile gloves (or similar protective gloves) and an apron.
- We’d also highly recommend the use of a chemical mask
Pro tip: Before starting, make sure your work surface is covered and you’re wearing the correct PPE as stated in the materials needed above. This is to avoid skin/respiratory irritation from the fragrance oil and mica powder and to protect your clothes from any splashes.
Step 1 – Weigh out the coconut oil and wax

Place the melting pot on your scales and turn on. Weigh out 161g of wax.

Next weigh out 69g of coconut oil. The total amount of coconut oil and wax combined should be 230g. You don’t need to zero out the scales as you can simply add the coconut oil until the scales show 230g.
Step 2 – Melt the wax and coconut oil

Half fill your pan with cold water and place on your cooker/stove top. Sit the melting pot on top of the pan. Turn the hob/ring on and set to a medium - low heat.

When the wax and coconut oil starts to melt, place the thermometer in the wax to check the temperature. Once the wax and coconut oil has fully melted and reaches no more than 75 degrees Celsius, take the pan off the heat and turn the hob off.
Pro tip: Don’t leave your thermometer in the melting pot whilst the wax is melting as it will get hot from the steam. Keep adding the thermometer to the wax at melting intervals to check it's not getting too hot.
Step 3 – Prepare the fragrance oil
Do this step whilst the wax is melting.

Take the measuring cup and weigh out 20g of Mulberry fragrance oil.

Then take a small amount of fiery fusion mica powder and add this to your fragrance oil. Stir it in carefully to break up any clumps.
Step 4 – Add the fragrance oil

Take the melting pot off the pan as soon as the wax has melted, wiping the underneath carefully with a tea towel. Once the wax reaches 65 degrees Celsius, add the fragrance oil and mica powder mixture.

Stir continuously for around 90 seconds to ensure the fragrance oil and mica powder is thoroughly mixed into the wax. (You’ll notice a beautiful, mesmerising swirly effect in the wax from the addition of the mica powder!)

Next add 6 drops of scarlet liquid dye and stir for a further 10-20 seconds to ensure the liquid dye is combined with the wax and fragrance oil.
Step 5 – Pour the wax into the jar

Once stirred and the temperature has reached 55-60 degrees Celsius, you can start to fill the jar.

When the jar is filled, take a little red glitter and sprinkle it on top of the wax. It doesn’t matter if some sinks to the bottom, but you’ll need to ensure that there’s a good covering on top.

Leave the wax to set for around 2-3 hours before putting the lid on and moving. The addition of the coconut oil makes the wax much softer than usual so the time allowed to fully set is slightly increased.

Your scoopable wax is now made and will be ready to use once cured in around 7 days.

To use, scoop out some wax using a spoon and add to your burner. Enjoy the fragrance until it disappears then replace with another spoonful (or two) of wax.

Note: As we’ve used a container wax, you may notice that the edges of the wax inside the jar appear to ‘frost’ over time. This is completely normal and is simply down to the addition of colour in the wax and varying temperatures from the jar being stored whilst curing and not in use.

With scoopable wax becoming ever more popular, we hope you enjoyed our tutorial and learned how easy it can be to create your own.
Want to make a variety of scoopable wax jars? Take a look at our huge selection of fragrance oils, liquid dyes, mica powders and glitters to see what takes your fancy for your next creation.
Looking to start selling your home fragrance products? Take a look at our Ultimate Guide to Selling Your Handmade Candles & Wax Melts.
13 Comments
Where do u get the clp from … for the sqeezeable wax
What CLP labels are suitable for this? And can you use any soy wax or is it specific wax?
Many Thanks
Hi, could you use the coconut & soy blend for this instead of using soy and coconut oil?
Hi Ruth, As mentioned in the post, frosting is completely normal and is simply down to the addition of colour in the wax and varying temperatures from the jar being stored whilst curing and not in use but it will have no impact on the performance. You have a few options: You can embrace it, knowing this is just a natural characteristic of soy wax or you can try reducing the amount of colour you use or you can consider using containers which are opaque. Hope that helps! Kimberly – Craftovator
Hi, I have made the scoopable wax, have quite a lot of frosting which is spoiling the look of the jar…..Help :-)