Game of Thrones House of the Dragon-Inspired "Bleeding" Dragon Egg Wax Melts
With the new series of Game of Throne’s House of the Dragon serving as inspiration, we thought it’d be the perfect opportunity to celebrate the new series with our very own ‘bleeding’ dragon egg wax melts. While they may not hatch baby dragons, they will release our sumptuous Dragon’s Blood Fragrance Oil creating the perfect atmosphere for GOT watch parties or for Halloween.

If you’re as big of the fan of the show as we are, you’ll absolutely love our tutorial!
With Halloween just around the corner, these will be the perfect product to introduce to your business or to make for your own use at home. By using a combination of candle dye chips and a brushing of sparkling mica powder, you can create your own ‘bleeding’ dragon’s egg wax melts, providing a mystery air to your lair this Halloween.

Pairing our sensuous, fiery, floral Dragons Blood fragrance oil with the theme really sets the tone. This freesia and ylang floral accord is accompanied by fruity notes of mandarin, red apple and berry followed by exotic patchouli, sumptuous amber, sandalwood and incense.
Follow our video tutorial below or, if you prefer reading, continue below to see our detailed written guide below with pictures to create this yourself.
If you’re new to wax melt making, then we’d recommend starting with our beginner’s tutorial, How to Make Wax Melts in Clam Shells, which will guide you through the process in making wax melts and provide all the information you need to get started. Once you’ve mastered making simple wax melts, you’ll feel confident with creating more advanced techniques as shown in this tutorial.

Difficulty Level: Intermediate
Makes: 8 Wax ‘Eggs’, approximately 24g each
Ingredients

- 188.6g Kerawax 4600 Paraffin Pillar Wax
- 16.4g Dragons Blood Fragrance Oil
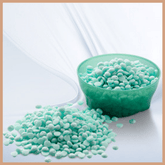
- Grey Candle Dye Chips
- Cranberry Candle Dye Chips
- Gold Synthetic Mica Powder
Materials Needed

- 1x Silicone egg shaped mould
- 1x Silicone 8-chunk (9 cell) block mould*
- Digital weighing scales
- Milk or digital thermometer
- Metal spoon
- Paintbrush (or clean make up brush)
- Melting pot
- Pan
- Kitchen roll to protect your work surface and for wiping tools
- Nitrile gloves (or similar protective gloves) and an apron. We’d also highly recommend the use of a chemical mask
*We used this mould to create smaller chunks for the red wax to sit within each egg mould. However, you can also use our Mini 4 Square Wax Melt Clamshells – fill two cells (following the guide in Part 1 of the steps below) and very carefully cutting each block when fully set into 4 with a knife.
Pro tip: Before starting, make sure your work surface is covered and you’re wearing the correct PPE as stated in the materials needed above. This is to avoid skin/respiratory irritation from the fragrance oil and mica powder and to protect your clothes from any splashes.
Part 1 – Making the ‘Bleeding’ Wax Melt Chunks
Step 1 – Weighing out the wax and adding the dye chip

Place the melting pot on your scales and add half of one cranberry dye chip to it. You may be able to snap it in half but if this proves difficult, you can carefully use a knife instead.

Turn the scales on and weigh out 27.6g of wax.
Step 2 – Melting the wax and dye chip

Half fill your pan with cold water and place on your cooker/stove top. Sit the melting pot on top of the pan. Turn the hob/ring on and set to a medium - low heat.
Top tip: The water in your pan should be no more than halfway up your melting pots bowl.

When the wax starts to melt, place the thermometer in the wax to check the temperature. Once the wax has fully melted and reaches 85-90 degrees Celsius, take the pan off the heat and turn the hob off. The wax needs heating to a slightly hotter temperature to ensure the dye chip is fully dissolved. Give the wax a good stir.
Pro tip: Don’t leave your thermometer in the melting pot whilst the wax is melting as it will get hot from the steam. Keep adding the thermometer to the wax at melting intervals to check it's not getting too hot.
Step 3 – Adding the fragrance oil

Take the melting pot off the pan and allow the wax to cool to 78 degrees Celsius before adding 2.4g of Dragons Blood fragrance oil. Stir continuously for around 90 seconds to ensure the fragrance oil is thoroughly mixed into the wax.
Step 4 – Pouring the wax into the block mould

Once stirred, fill one 8-chunk cell of the block mould, being careful to not overfill it.

This mould is now done. Leave the wax to set fully for at least 1 hour.
Step 5 – Cleaning the melting pot

Place the melting pot over the pan and carefully wipe the remaining wax off ready for part 2. The heat from the water should melt the setting wax enough to be able to do this step. If not, turn the hob onto a low heat to gently melt the wax.
Part 2 – Making the Dragon’s Eggs
Do not start Part 2 until the wax in the block mould is fully set.
Step 1 – Breaking up the 8-chunk block wax melt

Take the wax melt block out of the mould and break into 8 chunks. Set aside on a piece of kitchen paper until needed.
Step 2 – Weighing out the wax and adding the dye chip

Place the melting pot on your scales and add 2 grey dye chips to it.

Turn the scales on and weigh out 161g of wax.
Step 3 – Melting the wax
There should be enough water in the pan for this step. Sit the melting pot on top of the pan. Turn the hob/ring on and set to a medium - low heat.

When the wax starts to melt, place the thermometer in the wax to check the temperature.

Once the wax has fully melted and reaches 85-90 degrees Celsius, take the pan off the heat and turn the hob off. Give the wax a good stir.
Step 4 – Adding the fragrance oil

Take the melting pot off the pan and allow the wax to cool to 78 degrees Celsius before adding 14g of Dragons Blood fragrance oil.
Stir continuously for around 90 seconds to ensure the fragrance oil is thoroughly mixed into the wax.
Step 5 – Pouring the wax into the egg mould

Once stirred, you can start to fill the egg mould cells. You’ll need to fill around ¼ of each cell for this step.

Sit the melting pot back on top of the pan (with the hob off). You’ll be needing the rest of the wax a little later on.
Step 6 – Adding the ‘bleeding’ wax melt chunk

As soon as the layer of wax has been added to the egg cells, wait a few minutes to allow the wax to start setting then take a chunk of the red wax and place in the centre of each egg cell. Carefully push the chunk into the wax slightly but not too much that it goes all the way to the bottom.

Pro tip: This wax sets fairly quickly so doing this step straight away will allow you to get the best results.
Leave the wax to set fully for around 15-30 minutes before moving onto the next step.
Step 7 – Warming the remaining wax

There should still be enough water in the pan for this step. Turn the hob/ring on and set to a low heat.
You want the wax to be warmed enough to pour into the mould without it setting instantly, around 75 degrees Celsius. A low heat is required so as not to burn off the fragrance oil within the wax.
Step 8 – Pouring the remaining wax into the egg mould

As soon as the wax has melted, fill the egg cells with the remaining wax, making sure to leave around a 5-10mm gap between the wax and the top of each cell. This will ensure the egg won’t overflow in your wax burner’s well as it melts.

It doesn’t matter if you have a little wax left over from this step. It’s better to have too much than not enough. Simply pour it into the block mould for later use rather than let it go to waste.

Leave the wax to set fully for around 1-2 hours before taking out of the mould.
Step 9 – Brushing on the gold mica powder

Once the wax eggs have fully set, carefully take them out of the mould and place on a clean piece of kitchen roll.

Take the paintbrush and lightly brush gold mica powder over the tops of the eggs, varying the amount and placement to create a more organic effect. You don’t need to use too much as a little goes a long way.

Your ‘bleeding’ dragon’s egg wax melts are now made and will be ready to use in 24-48 hours.

To use simply add one of the dragon’s eggs to your burner. Watch the dragons egg ‘bleed’ as the wax melts. As the wax melts, the gold mica powder coating will also mix with the wax giving off a subtle shimmer. Enjoy the fragrance until it disappears then replace with another dragon’s egg wax melt.
Considering selling your creations? Be sure to check out our Ultimate Guide to Selling Your Handmade Candles and Wax Melts for more information and guidance.


Leave a comment
All blog comments are checked prior to publishing